
This is the first in a series of blog posts about 3D and the interaction with Qt, KUESA™ and Qt 3D Studio, and other things that pop up when we’re working on something.
I’m a 3D designer, mostly working in blender. Sometimes I come across interesting problems and I’ll try to share those here. For example, trying to display things on low-end hardware – where memory is sometimes limited, meaning every polygon and triangle counts; where the renderer doesn’t do what the designer wants it to, that sort of thing. The problem that I’ll cover today is, how to easily create a reflection in KUESA or Qt 3D Studio.
Neither KUESA or Qt 3D Studio will give you free reflections. If you know a little about 3D, you know that requires ray tracing software, not OpenGL. So, I wondered if there would be an easy way to create this effect. I mean, all that a reflection is, is a mirror of an object projected onto a plane, right? So, I wondered, could this be imitated?

To recreate this, I’d need to create an exact mirror of the object and duplicate it below the original, and have a floor that is partially transparent. I’ve created a simple scene to show you how this technique works – a scene with two cubes, a ground plane and a point light.

Here’s the result of this scene. It’s starting to look like something, but I want to compare it to a ‘real’ reflection.
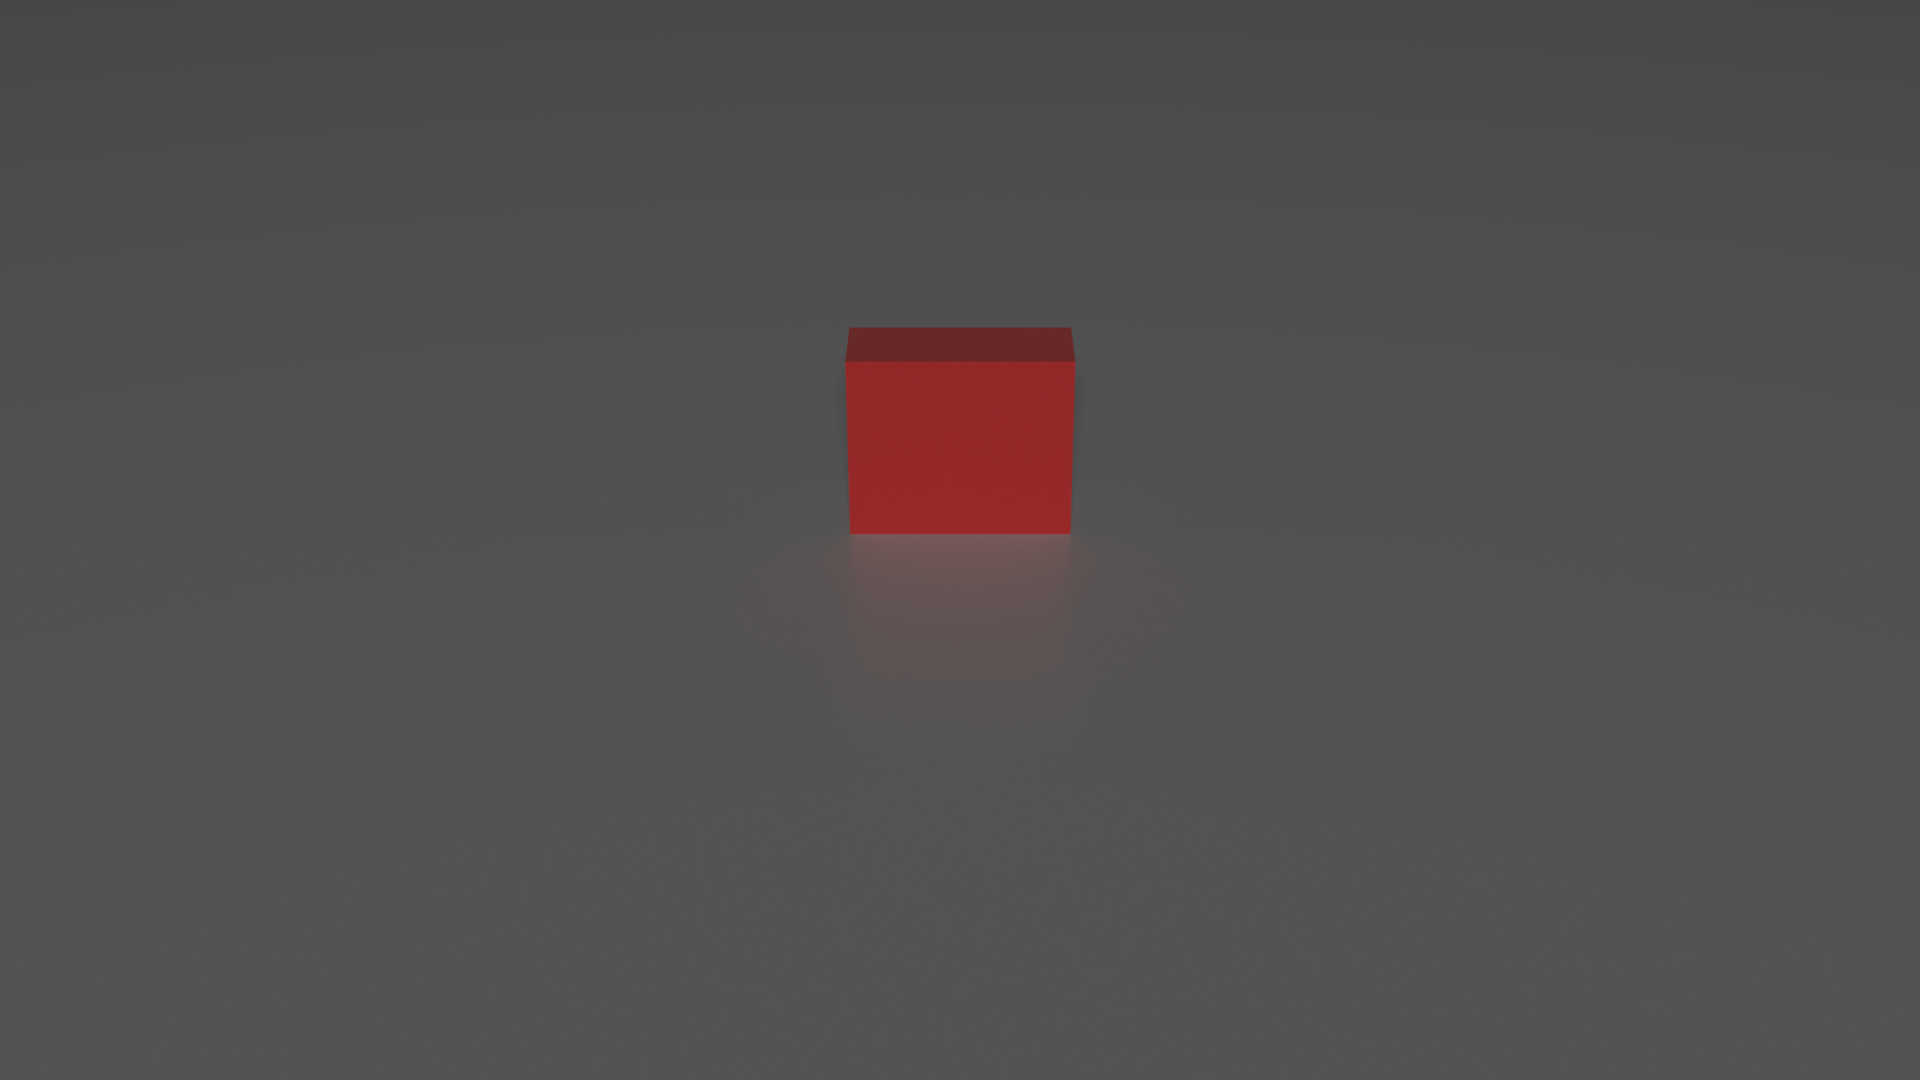
For comparison, the above is a cube on a reflective, rough surface – showing the result using raytracing. You can see here the reflection is different from our example above – the main issue is that the reflection eventually fades out the further away it gets from the contact point.
How to resolve this? This can be mimicked by creating an image texture for the alpha that fades out the model towards the top (or rather the bottom) of the reflection. I can also further enhance the illusion by ensuring that the floor is rough – allowing the texture of the surface to assist the illusion of a reflection.

Another difference between the shots is the blurriness on the edge of the mesh – this could be approximated by creating duplicates of the mesh and for each one, increasing the size and reducing the opacity. Depending on the complexity of the model, this may add too many polygons to render, while only adding a subtle effect.
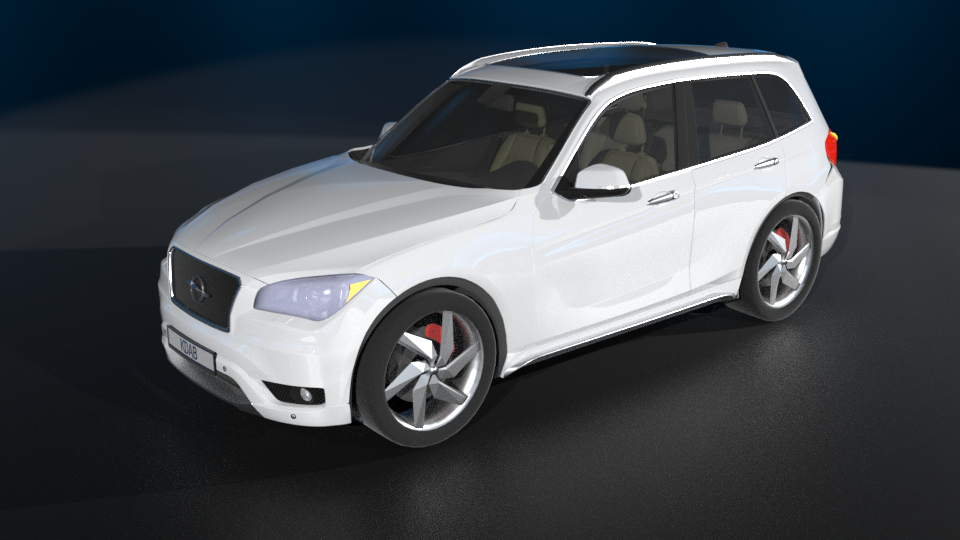
So, given that this is a very simple example and not one that would translate well to something that a client might ask for, how can I translate this into a more complex model, such as the car below? I’ll chat about that in the next post.